Show Weather Forecasts in a Card

Introduction

In this guided path, you will learn how to create create and configure a card to show the weather forecast for a specific location. The Weather card shows a 5-day weather forecast for your default location, or any location of your choice.

Weather card highlights include:

  • Ability to set the temperature unit in Fahrenheit or Celsius.
  • Option to display the temperature unit.
  • Option to display a motion background.
  • Option to display advanced weather information.
  • Option to display the location’s country or state.
  • Option to configure the text color.
  • Option to configure the background color.

Prerequisites

Before you begin, ensure that you have the following prerequisites met:

  • You will need Author permissions as a minimum for a channel.
    • Author permissions gives you the ability to create content for a channel. 
    • Author permissions are granted by a Publisher of that channel.

Create and configure the Weather card

You can create as many weather cards as you like, where each card will show the weather forecast and weather information for a specific location.

To create a Weather card, simply follow the steps below.

Create a card

Click on Create Card from the Quick Action menu to begin.

1

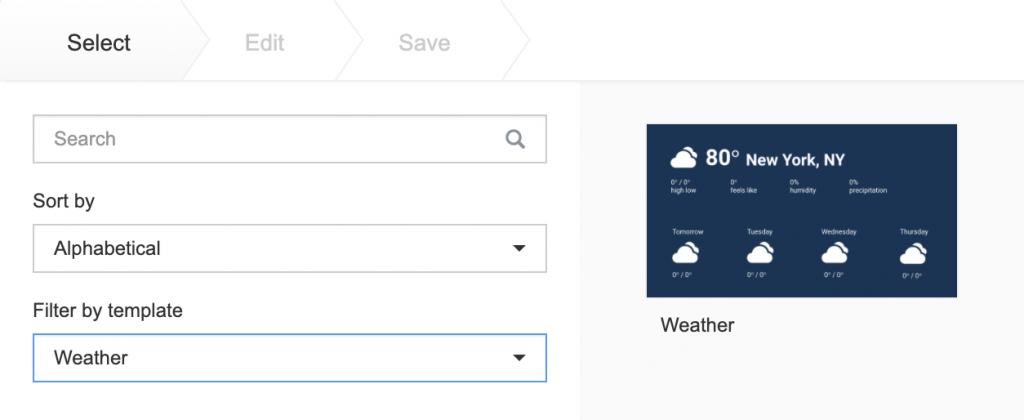
Select the Weather card template

To specifically view only the Weather card template, select Weather from the Filter by template dropdown at the left.

2

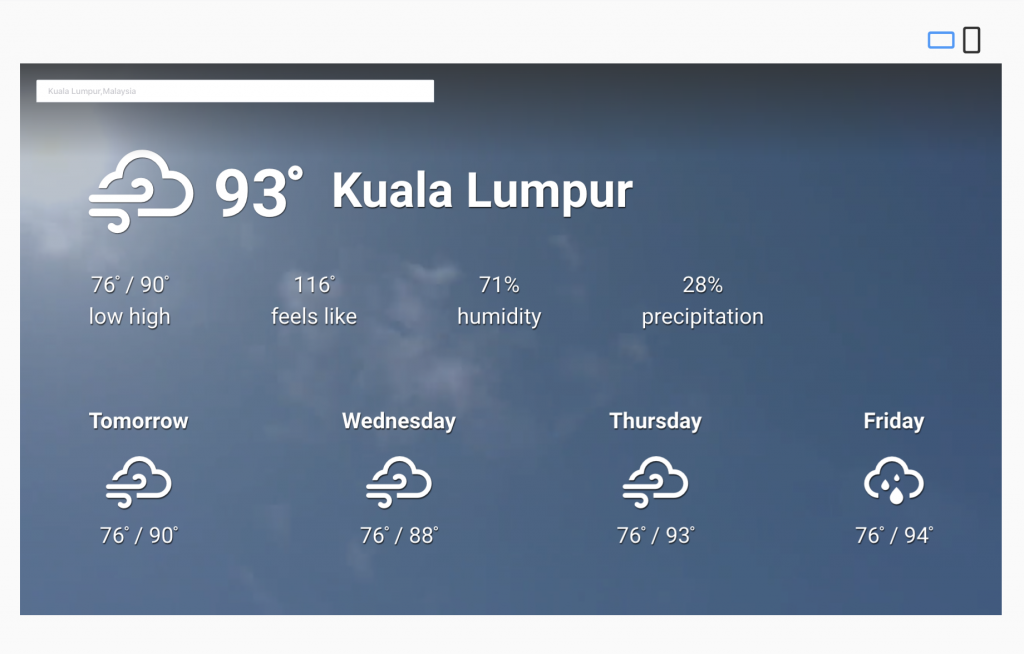
Set your weather forecast location

By default, the weather card will  automatically detect the current location to pull weather data. The location field will be auto-filled with the name of the current city location.

If you want to show the weather forecast for a specific location, you can override the default location and simply type in the name of the city or state into the location input field.

3

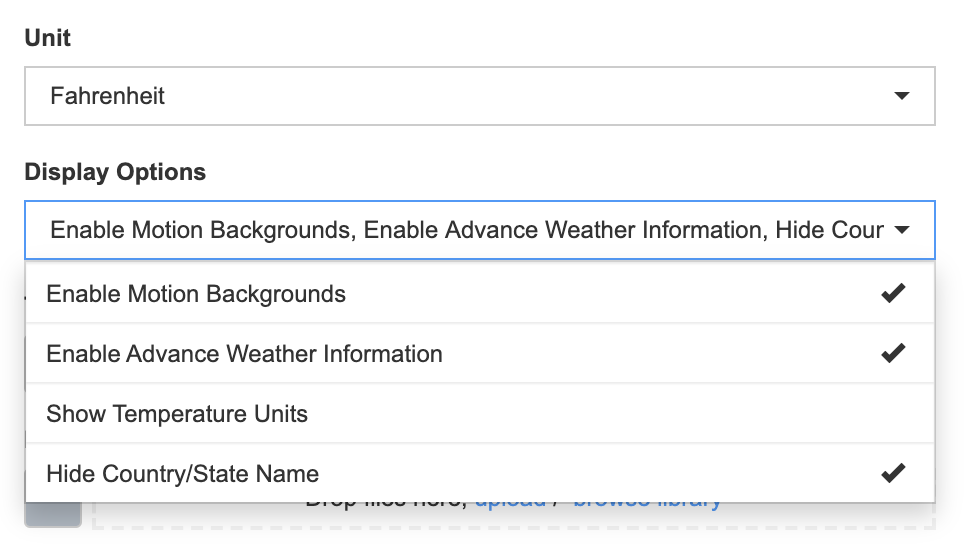
Set your display options

You can choose which temperature unit to use (Fahrenheit or Celsius) and also enable or disable additional display options.

Display options include the following

  • Enable Motion Backgrounds – Displays a video background that represents the weather condition.
  • Enable Advanced Weather Information – Displays extra weather information, such as temperature lows and highs, humidity, precipitation, and how the temperature feels like.
  • Show Temperature Units – Displays the temperature units (F or C).
  • Hide Country/State Name – Hides the country or state of the weather location.
4

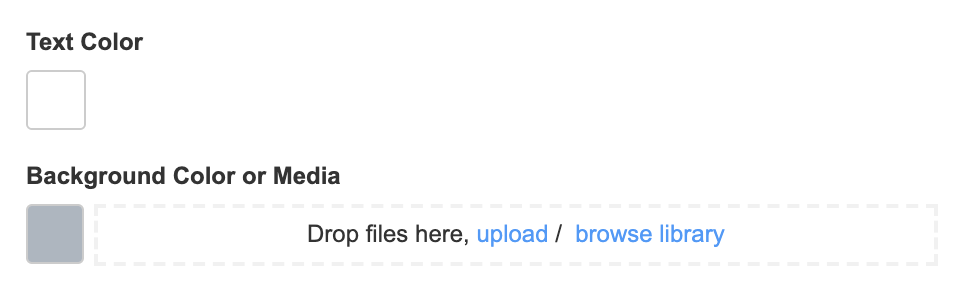
Optional: Text color and background

You also have the choice of overriding the design of the Weather card by setting your own preferred text color and background color. Setting your own custom background will override the default weather backgrounds.

If you wish to use a background image, simply drag and drop your background media file to Background Color or Media drop zones.

5

Confirm your card layout

Once you have confirmed the look and feel of your card layout, click on Next to proceed to the next part.

6

To the next part

Now that you have created the card layout that can be displayed in channels for TV screens and other larger screen devices, the next step is to provide the value-added long format articles that can be read on mobile devices.

Provide your card title and article

With your card layout created, you will then need to enter a title for your card, with the option to add an article.

Entering a card title is the only mandatory step. Others are optional, but add value.

Provide a card title

In the Title field at the top, enter a title to describe your new card.

1

Provide an article (optional)

If you have created a news headline or announcement, but would like to provide more details in a longer format article, you can write or copy+paste your article text into the Article block. When viewing the card on mobile devices, users will have the option to read the accompanying article. The standard text formatting options are available should you choose to use them.

2

Save your card

To complete the creation of your new card, click on the Save button and your card will appear in the chosen folder of your library.

3

Congratulations!

You have successfully created your Weather card.

You can repeat the steps in this guided path to create more cards. As a shortcut, there is also a checkbox option at the bottom to Create another that makes it faster for you to create a series of cards.

What's Next?

Deepen your knowledge of cards and channels by taking a look at more authoring paths and guides