Configure Cisco Devices For Digital Signage

Introduction

In this guided path, you will learn how to configure Cisco devices such as the Cisco Webex Boards, Room Series and Desk Series to display Appspace channels for digital signage. These devices have a feature that allows the display of digital signage on connected Cisco video screens when they are not being used for screen-sharing, whiteboarding, or conferencing. This functionality is called signage mode and is available on Cisco’s Webex Cloud.

To leverage signage mode on these Cisco devices, all you need to do is configure the device’s integrated browser to run an Appspace URL that points to the progressive web app version of the Appspace App. Once configured, The Appspace App will run on the browser as digital signage, and will be automatically enabled when the device is not in use for conference or collaboration.

Which Cisco devices are compatible?

This guided path focuses on using Cisco Webex Boards, Room Series and Desk Series devices for digital signage by enabling signage mode. Digital signage allows you to show custom content on Webex Boards, Room Series and Desk Series devices when they are in the half-wake state. Digital signage is a great way to display advertising content and promote your brand, but also show visitor and internal employee information, dashboards or calendars.

Supported devices include:

  • Cisco Webex Board Series: Board 55, Board 70, Board 85S
  • Cisco Webex Room Series: Room 55, Room 70, Room Kit, Room Kit Mini, Room Kit Plus, Room Kit Pro.
  • Cisco Desk Series: Desk Pro

Cisco also have a wide range of collaboration devices that utilize a background wallpaper that can be configured to show Appspace playlist channels.

To configure these wallpaper-based collaboration article, please read this how-to article.

Prerequisites

Before you begin, ensure that you have the following prerequisites met:

  • You will need Location Admin permissions as a minimum.
    • Location Admin permissions gives you the ability to manage devices and users for a location.
    • As a Location Admin, you can register and configure devices.
    • Location Admin permissions are granted by an admin of the location, which can either be the Account Owner or other Location Admins.
  • You have a Cisco Webex Board device or Room Series device to configure.

Configure the device for signage mode

In order to use the Cisco device for digital signage, it must first be configured to enable signage mode. The first two steps will need to be done on the Cisco device itself, and the rest will be managed through Appspace.

To enable a Cisco device for digital signage and register it to Appspace, simply follow the steps below.

Enable Signage Mode on the Cisco Device

To enable signage mode on Cisco Webex Boards, Room Series and Desk Pro devices, follow the instructions outlined by Cisco in this Cisco Help document.

You can perform the setup through either one of these methods:

  • Set Up Digital Signage Directly from Cisco Webex Control Hub
  • Set Up Digital Signage from the Web Interface
1

Enter the Appspace App URL on the Cisco Device

Enter the relevant Appspace App PWA URL in the Digital Signage URL field when required, as follows:

Appspace Public Cloud

  • https://cloud.appspace.com/app/?registrationmode=passive

Appspace Private Cloud

  • https://customer.cloud.appspace.com/app/pwa/?registrationmode=passive
2

Idle mode and registration code

Now that signage mode is enabled, you will need to register the Cisco device with Appspace.

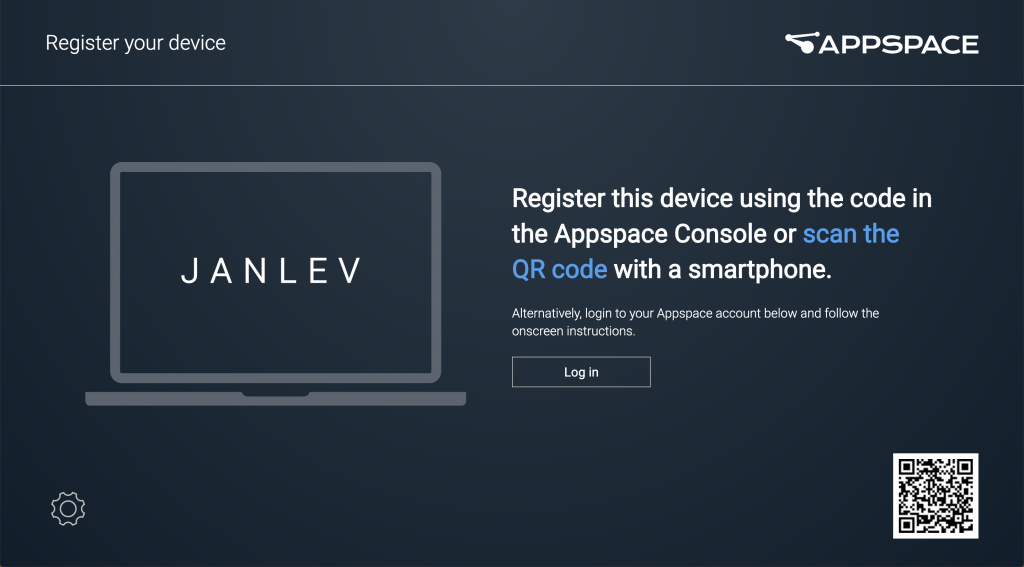
Let the device enter its half-wake state to activate signage mode for the first time. Doing this will launch the Appspace App displaying the 6-character code. You will need this registration code to register the device with Appspace.

3

Appspace device registration form

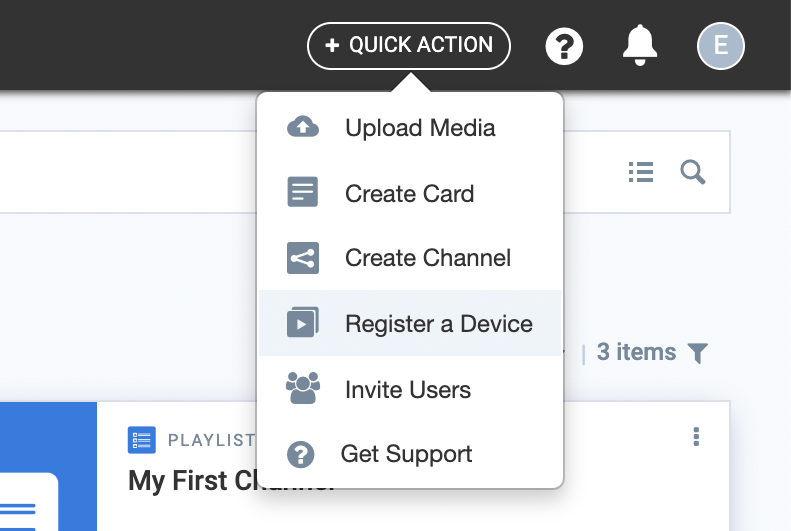
Click on Register a device from the Quick Action menu.

4

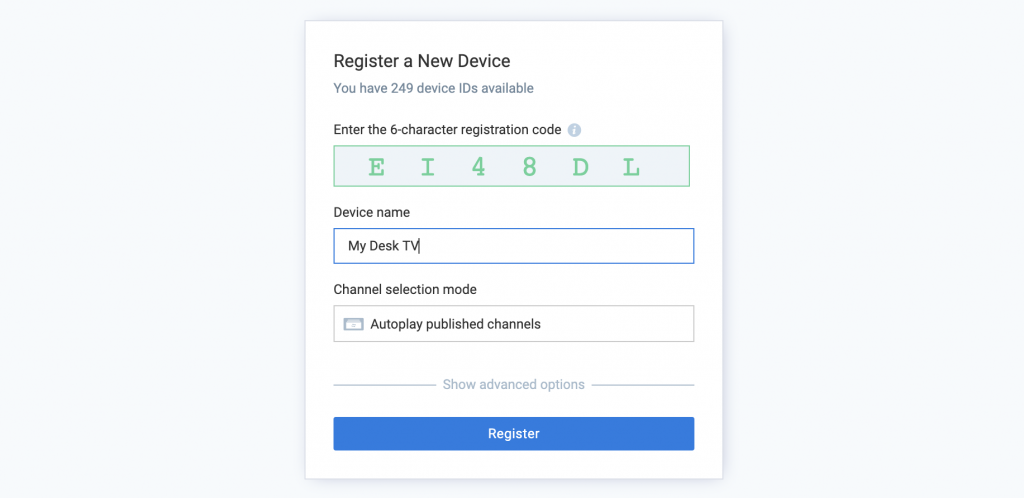
Register the device and give it a name

Take the 6-character code that you see on the device’s screen, and enter it into the registration input field. When a valid code is detected, the input field will be highlighted in green. Give your device a name.

5

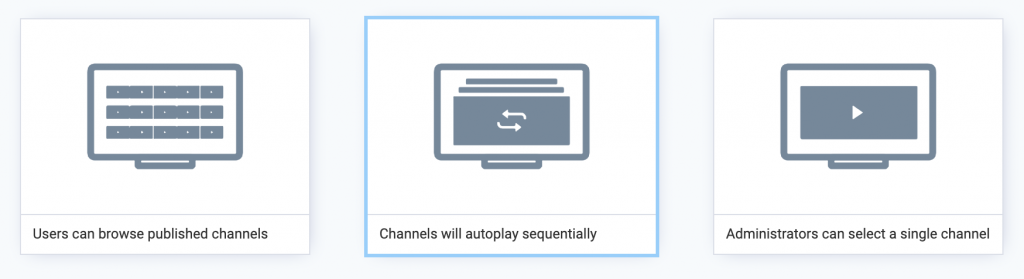
Set the channel selection mode

Click on the Channel Selection Mode field and select Channels will autoplay sequentially.

Optionally, you can also assign the device to one of the device groups in your network if applicable.

6

Complete the device registration

​Click on the Register button to proceed with the registration process. On the TV screen, you will see the automatic registration process step through to completion. Since there are no published channels available, it will not display any content yet.

It is now up to the publishers in your team to publish a channel to the newly registered device.

7

Congratulations!

You have successfully configured a Cisco device with signage mode enabled and have registered it with Appspace to display digital signage.

Now that you configured the Cisco device with signage mode enabled and registered it to Appspace, the next part of the process is to publish a channel to the device. At this stage, the device is now available in the inventory and can be targeted by the publishers in your organization. As long as publishers know the name of the device or the device group that it belongs to, they will be able to publish channels to it.

For extra credit, you can follow the guided path to publish channels for digital signage.

What's Next?

Deepen your knowledge of Appspace administration details for channels and more by taking a look at administration paths and guides.