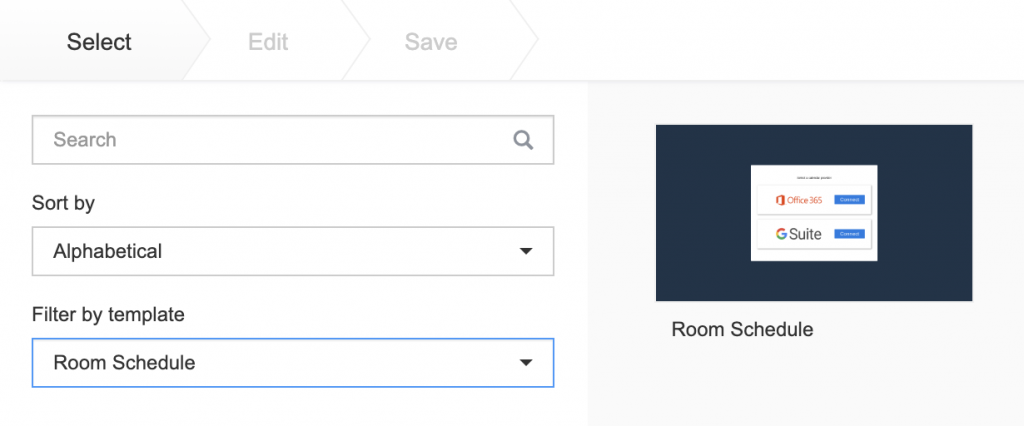
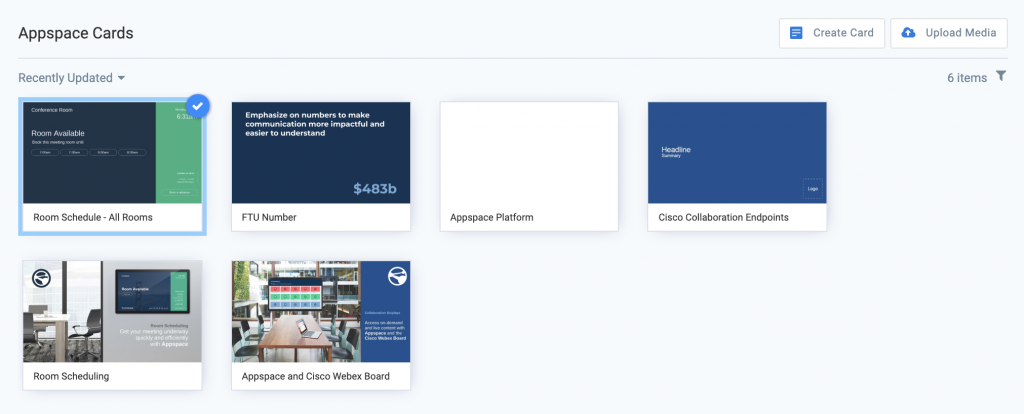
Create a new card with the Room Schedule template
In the console, select Create Card from the Quick Action menu. To quickly locate the Room Schedule card, select Room Schedule from the Filter by template dropdown.
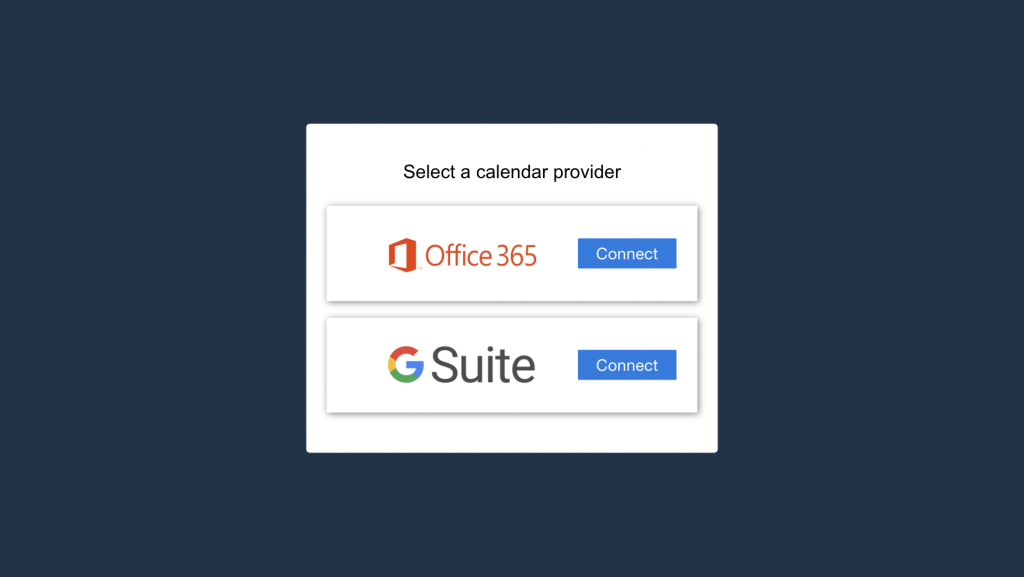
Select the G Suite option and enter credentials
If you have not done so already, please contact your IT administrator for credentials. Enter your booking account credentials to authenticate the Room Schedule card.
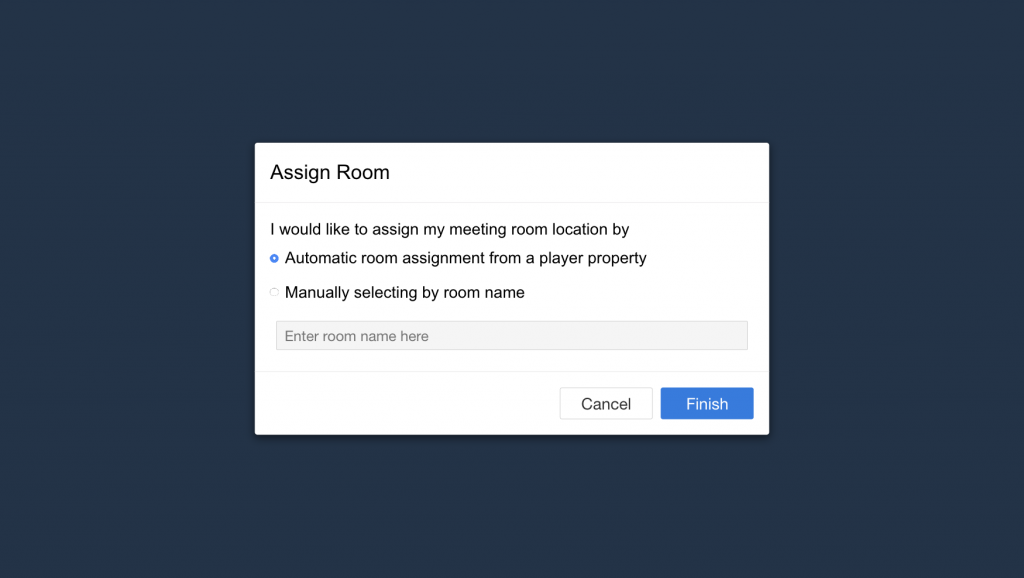
Automatic room assignment
This is the option we recommend as it allows you to use the same card (with the defined configuration and branding themes) for multiple rooms.
You must then add a device property to each device and ensure it points to the desired meeting room, where you will have one specific tablet for each meeting room.
Device property:
- card.room.roomid = resource id
Device property examples:
- Device property for Meeting Room 1 device: card.room.roomid = 47563454656
- Device property for Meeting Room 2 device: card.room.roomid = 34547409516
The resource id is obtained from the G Suite Calendar Resources page for each physical meeting room configured. For reference, please refer to the how-to article: Configure resources (meeting rooms) in Google Calendar.
Once the calendar provider configuration is complete, you will need to add in the device property. Click here for how-to instructions to add a device property. You will need Location Admin or Account Owner privileges to add device properties.
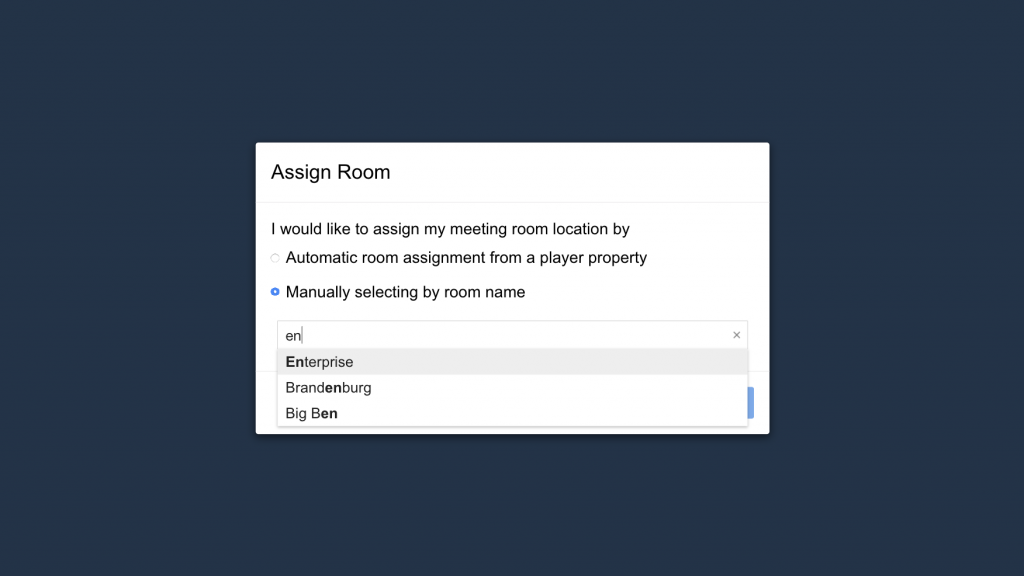
Option for manual room assignment
If you prefer to assign a specific Room Schedule card and channel per device, then you can select the manual room assignment option. The calendar provider will return a list of selectable rooms, and you will need to choose one.
With the manual room assignment option, this means that if you have 10 rooms, you must create 10 cards for each room.
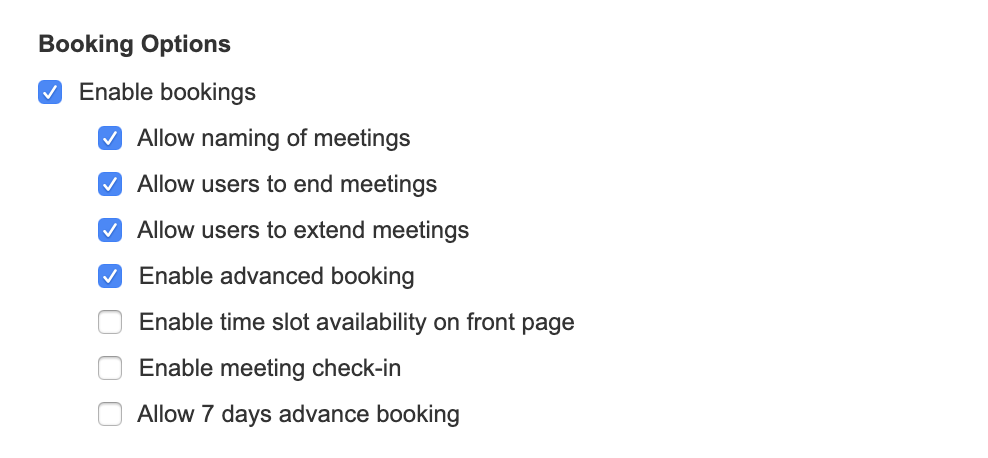
Configure booking options
Check the option to Enable bookings to configure room booking options that can be made available to people. Room booking options include:
- Allow naming of meetings
- Allow users to end meetings
- Allow users to extend meetings
- Enable advanced booking
- Enable time slot availability on front page
- Enable meeting check-in
- Allow 7 days advance booking.
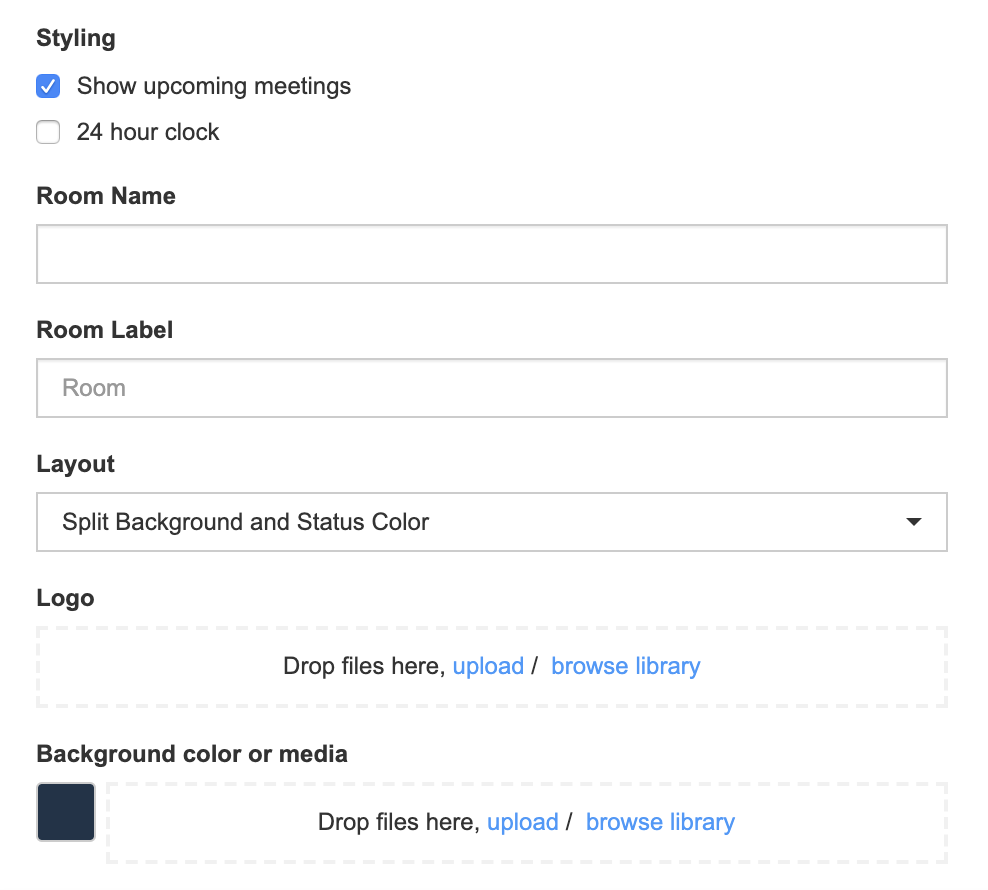
Additional styling options
Under the Styling section, you can check the option to Show upcoming meetings to display upcoming meetings of the day. To display the time in 24 hour format, check the option for the 24 hour clock.
You can also stylize the card further with the following options and components:
- Room Name
- Room Label
- Layout
- Logo
- Background color or media
- Background Mask Color
- Available State Color
- Occupied State Color
Save the Room Schedule card
Once you have finished configuring all of the Room Schedule details, click on Next to finish the card creation process. Give your card a title, and make sure that you are saving the card to the folder and library location of your choice. Click on Save to complete.
Create a new card with the Room Schedule template
In the console, select Create Card from the Quick Action menu. To quickly locate the Room Schedule card, select Room Schedule from the Filter by template dropdown.
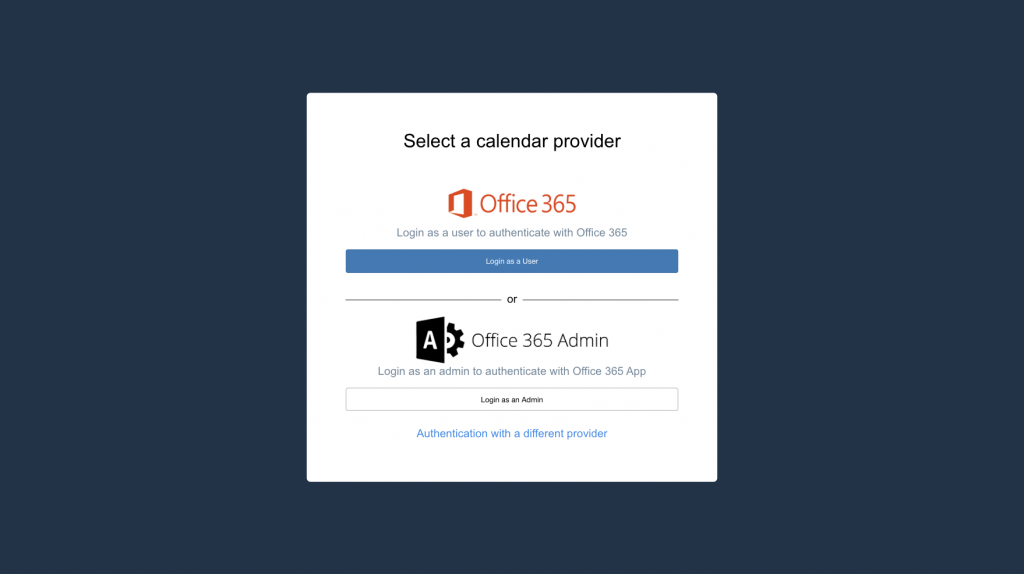
Select the Office 365 option and enter credentials
If you have not done so already, please contact your IT administrator for credentials. Some large organizations may have one account for each room.
Select the appropriate authentication depending on your booking account type.
Automatic room assignment
This is the option we recommend as it allows you to use the same card (with the defined configuration and branding themes) for multiple rooms.
You must then add a device property to each device and ensure it points to the desired meeting room, where you will have one specific tablet for each meeting room.
Device property:
- card.room.roomid = resource id
Device property examples:
- Device property for Meeting Room 1 device: card.room.roomid = room-001@appspacedev.onmicrosoft.com
- Device property for Meeting Room 2 device: card.room.roomid = room-002@appspacedev.onmicrosoft.com
The resource id is the email alias obtained from the Office 365 Calendar Resources page for each physical meeting room configured.
Once the calendar provider configuration is complete, you will need to add in the device property. Click here for how-to instructions to add a device property. You will need Network Admin or Account Owner privileges to add device properties.
Option for manual room assignment
If you prefer to assign a specific Room Schedule card and channel per device, then you can select the manual room assignment option. The calendar provider will return a list of selectable rooms, and you will need to choose one.
With the manual room assignment option, this means that if you have 10 rooms, you must create 10 cards for each room.
Configure booking options
Check the option to Enable bookings to configure room booking options that can be made available to people. Room booking options include:
- Allow naming of meetings
- Allow users to end meetings
- Allow users to extend meetings
- Enable advanced booking
- Enable time slot availability on front page
- Enable meeting check-in
- Allow 7 days advance booking.
Additional styling options
Under the Styling section, you can check the option to Show upcoming meetings to display upcoming meetings of the day. To display the time in 24 hour format, check the option for the 24 hour clock.
You can also stylize the card further with the following options and components:
- Room Name
- Room Label
- Layout
- Logo
- Background color or media
- Background Mask Color
- Available State Color
- Occupied State Color
Save the Room Schedule card
Once you have finished configuring all of the Room Schedule details, click on Next to finish the card creation process. Give your card a title, and make sure that you are saving the card to the folder and library location of your choice. Click on Save to complete.
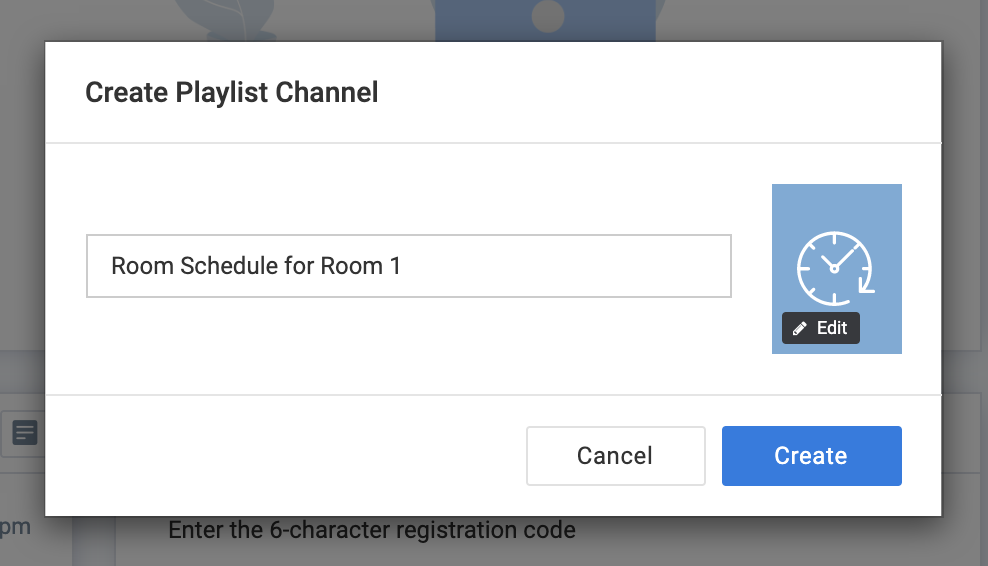
Create a new channel for the Room Schedule card
Create a new channel by clicking on Create Channel from the Quick Action menu. This channel will contain only a single item which will be the Room Schedule card that you have configured. Since it will only contain this single item, you can give a name that best describes the function of the channel such as Room Schedule for Room 1. You can also select a custom icon to make it easy to identify the channel for assignment.
Add the Room Schedule card to the channel
Click on the Add Content button in the newly created channel and select the Room Scheduled card you created and configured.
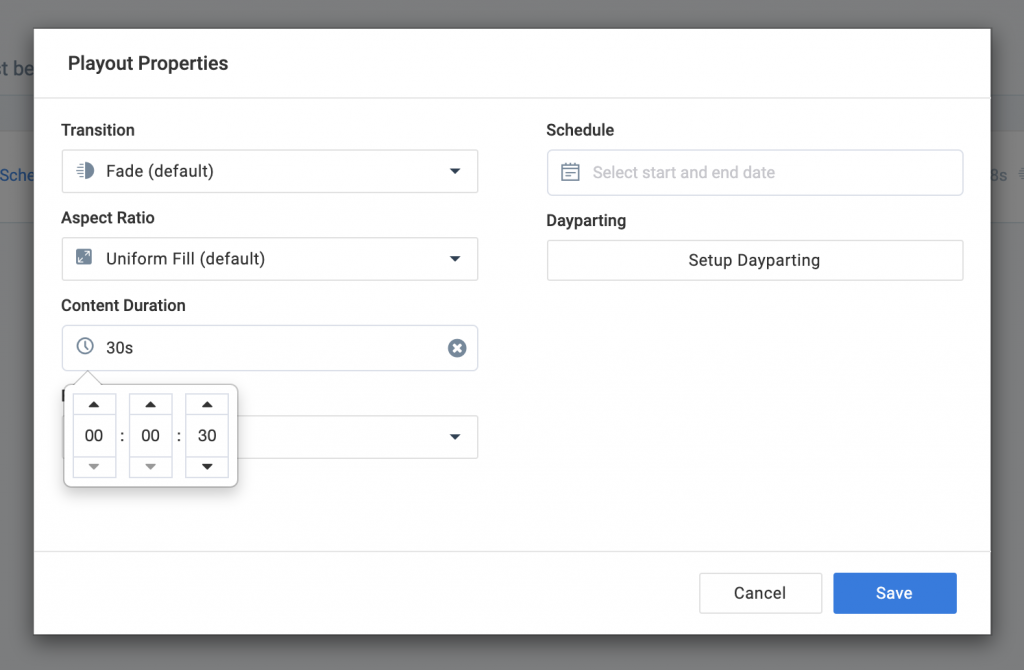
Set the content duration for the Room Schedule card
As your channel will only have a single Room Schedule card, we recommend setting the content duration to a minimum of 30 seconds instead of the default value of 8 seconds. This ensures that the channel does not keep reloading the card while someone is in the process of booking the room. Click on Apply to confirm your settings.
Select your target device for assignment
With the channel ready, you will then need to assign the channel to your target device. Go to the Devices workflow and select the device from the list to do the channel assignment.
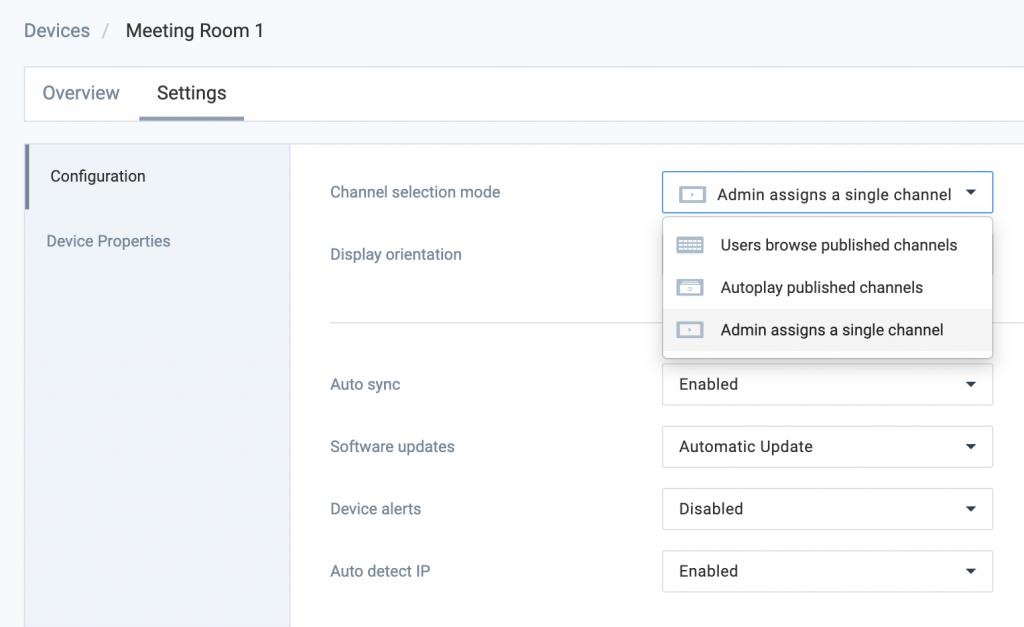
Selecting the device will launch the Device Information overlay. Click on the Settings tab and select Admin assigns a single channel from the Channel selection mode dropdown. Click on Save to apply the settings.
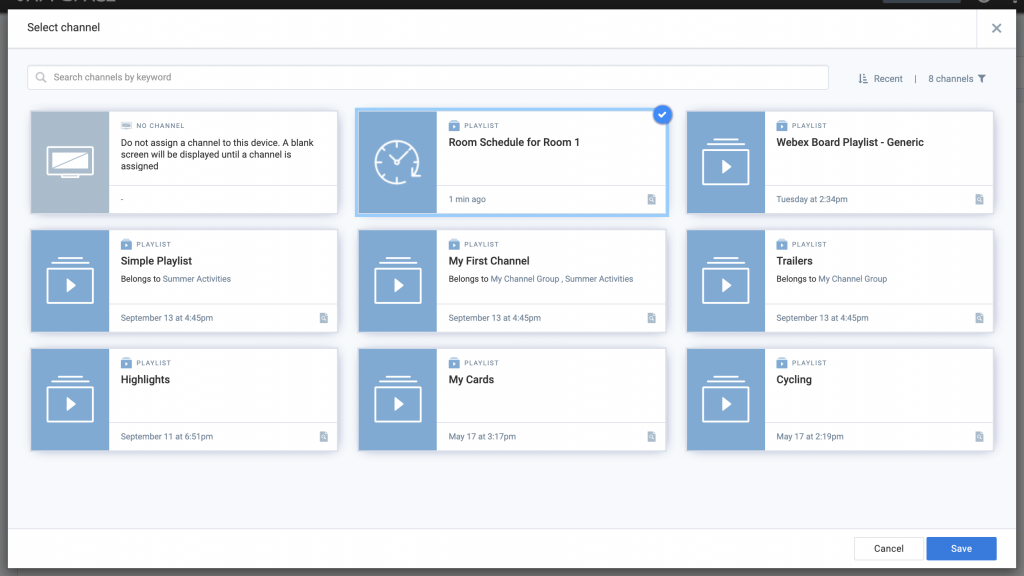
Set the channel assignment for the device
Click on the Overview tab and you will now see the option to select a channel for this device. Click on the Select channel button and select the Room Schedule channel you created and then click on Save to confirm the channel assignment.
Once the settings take effect, the device will automatically show the appropriate details for the room. You are now ready to book meetings!
Was this article helpful?