Configure the Schedule Board Card

Introduction

In this guided path, you will learn how to configure the Schedule Board card with your preferred calendar provider. The Schedule Board card lets you view schedules of multiple meeting spaces within your organization from a single large display, while providing the ability to make instant bookings for any of the connected meeting spaces.

The Schedule Board card is a type of service card that requires an administrator to configure a service, which in this case is a calendar provider. The calendar provider will contain information for all the rooms in an organization that can be used for conferencing, and will need to be configured so that the card is able to show room information and connect to booking functions.

Booking functions on this card include:

  • Book now – ability to book 30 minutes, 1 hour, or 1.5 hours from the current time, based on room availability.
  • Book in advance – book future time slots (on the same day only) or up to 7 days in advance, based on room availability.
  • Extend meeting – extend current meeting by 30 minutes, 1 hour, or 1.5 hours.
  • End meeting – end current meeting, and make the room available.
  • Check in – option to check in to a meeting from 10 minutes before until 10 minutes after the start of the meeting.

The Schedule Board card works with the following cloud-based calendar providers:

  • Google G Suite
  • Microsoft Office 365

Prerequisites

Before you begin, ensure that you have the following prerequisites met:

  • You will need Editor or Publisher permissions to be able to create the card.
  • You will need Location Admin permissions as a minimum to manage and configure devices.
    • Location Admin permissions gives you the ability to manage devices and users for a location.
    • As a Location Admin, you can register and configure devices.
    • Location Admin permissions are granted by an admin of the location, which can either be the Account Owner or other Location Admins.
  • You have already installed the Appspace App and registered the appropriate tablet devices to Appspace.

You will also need to have your calendar provider configured beforehand. Please refer to the following how-to articles to configure the appropriate calendar provider that is used in your organization:

Google G Suite

Follow the instructions in the following article: Create a Google G Suite booking account and configure resources.

Microsoft Office 365

Follow the instructions in the following article: Configure Microsoft Office 365 Room Booking Service with User Privileges.

Create and configure the Schedule Board card

Now that you have your calendar provider configured and the Appspace App installed and running on a registered device, you can start the process of running the Schedule Board card on it.

To create a Schedule Board card and configure it for your device, simply follow the steps below.

Create a new card with the Room Schedule template

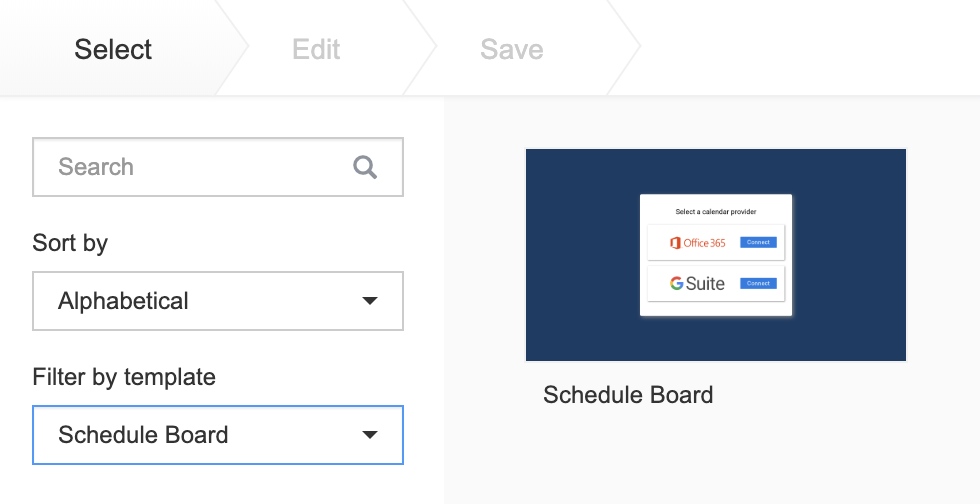
In the console, select Create Card from the Quick Action menu. To quickly locate the Room Schedule card, select Schedule Board from the Filter by template dropdown.

1

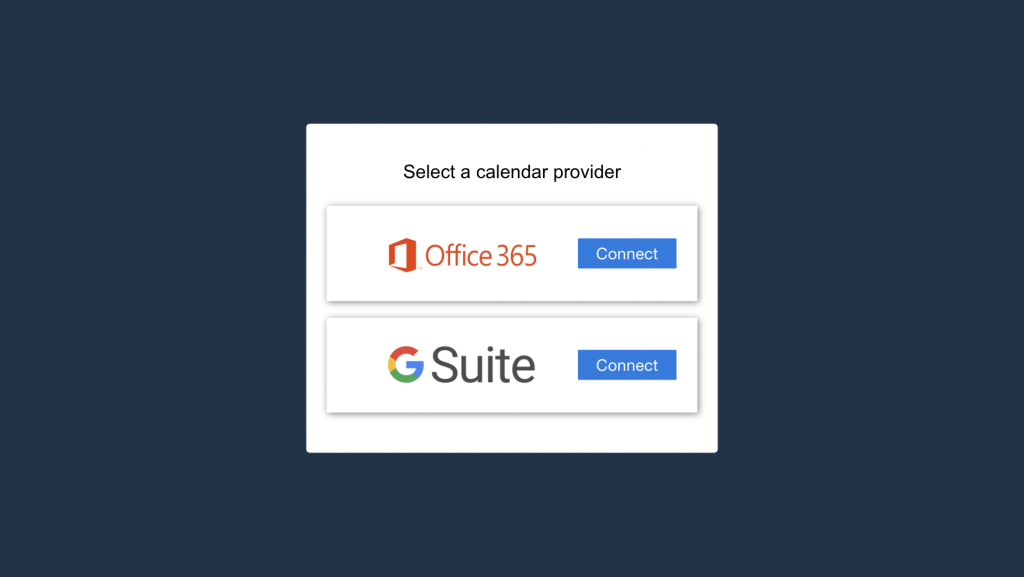
Select a calendar provider and enter credentials

If you have not done so already, please contact your IT administrator for credentials.  Enter your booking account credentials to authenticate the Schedule Board card.

2

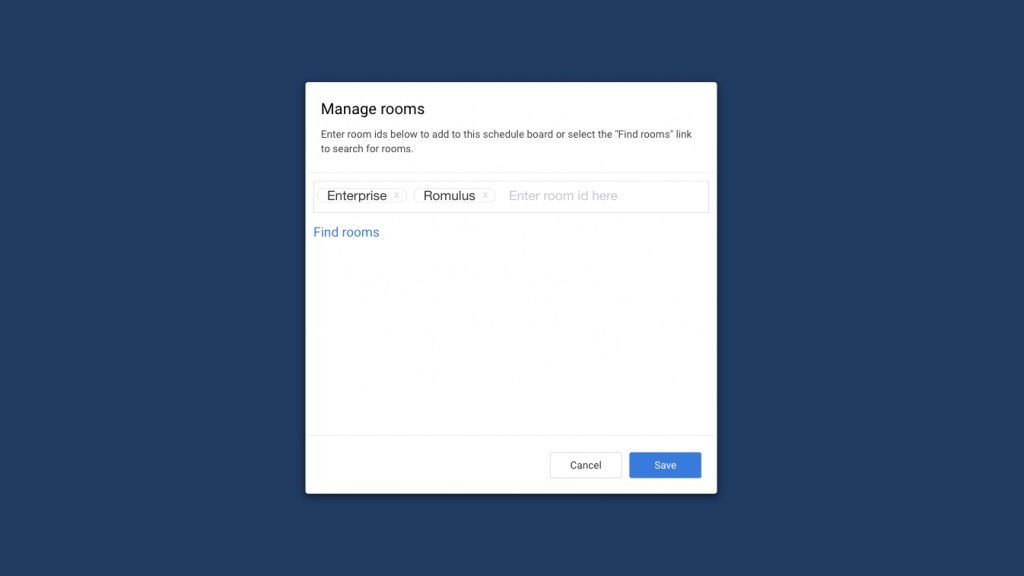
Select rooms to display

Once authentication is successful, you can select which rooms you want to display on the Schedule Board. You can enter the room ids directly into the input field, or you can click on Find rooms to search for the desired room to add from the calendar provider.

Click on Save once your room selection is complete and the rooms will be added to the Schedule Board card.

3

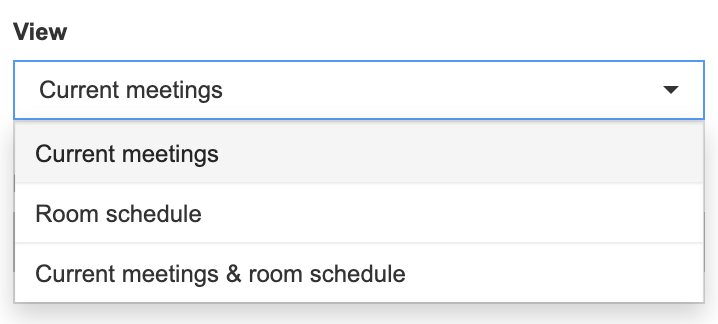
Select a view option

Select a View option from the drop-down menu to display how the room information will be displayed.

  • Current meetings – This view shows the current meetings that are happening. Rooms that do not have any current meetings will be shown as available.
  • Room schedule – This shows a timeline view of all room schedules, starting from the current time to a few hours ahead.
  • Current meetings & room schedule – This allows you to switch between both views, and is best used for an interactive screen.
4

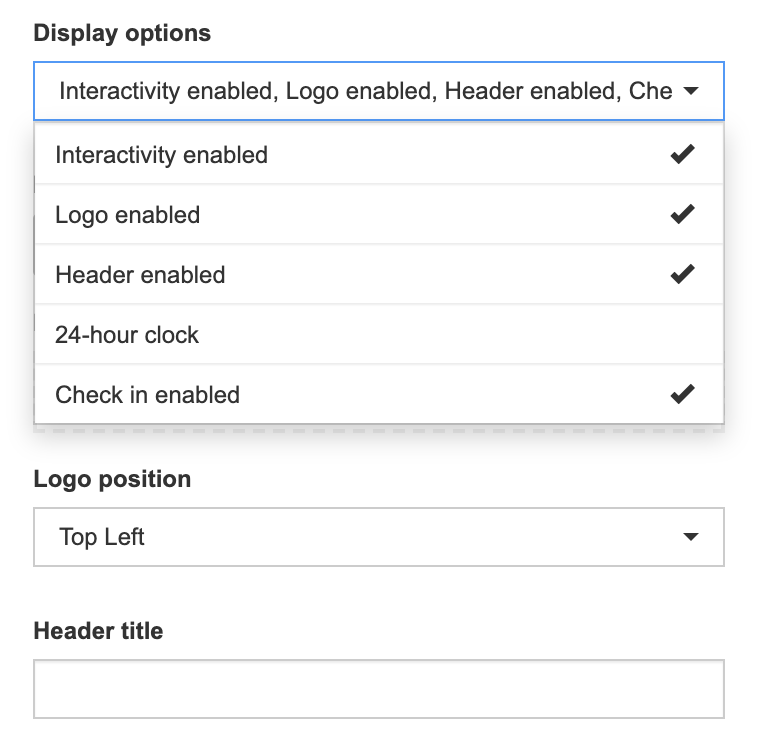
Additional display options

You can also choose which Display options should be shown on the Schedule Board. By default, all options are enabled with the exception of the 24-hour clock.

Display options include:

  • Interactivity enabled
  • Logo enabled
  • Header enabled
  • 24-hour clock
  • Check in enabled

You can also specify the position of your logo, and also provide your own custom Header title if you want to override the default title that is displayed for the Schedule Board card.

5

Save the Schedule Board card

Once you have finished configuring all of the Room Schedule details, click on Next to finish the card creation process. Give your card a title, and make sure that you are saving the card to the folder and library location of your choice. Click on Save to complete.

6

To the next part

Now that you have created and configured the Schedule Board card with a calendar provider, the next step is to add the Schedule Board card to a channel that will then run on the appropriate device.

Add the Schedule Board card to a channel

Now that you have the Schedule Board card configured to work with your calendar provider, you will need to add the card to a channel which can then be assigned to your targeted devices.

To create a channel with your Schedule Board card and configure it for your device, simply follow the steps below.

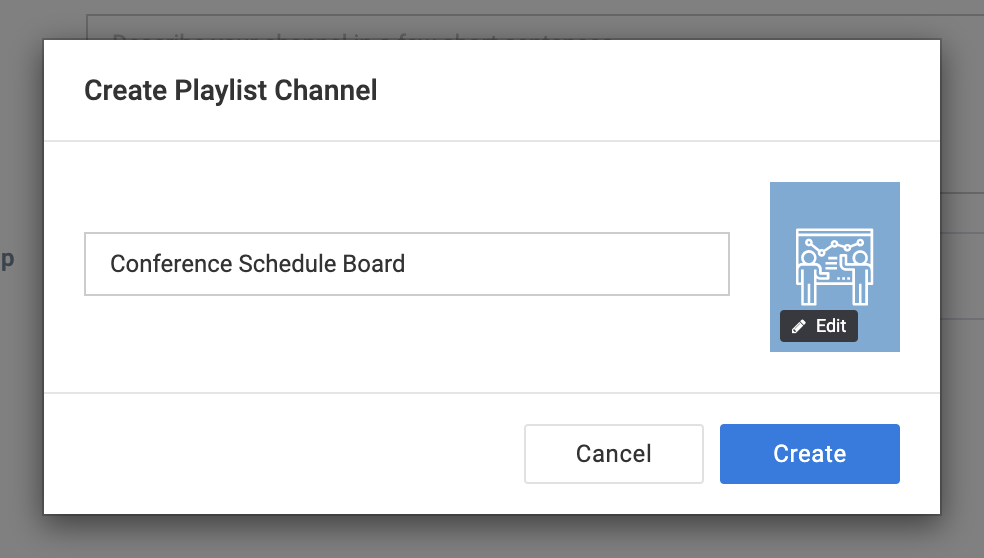
Create a new channel for the Schedule Board card

Create a new channel by clicking on Create Channel from the Quick Action menu. This channel will contain only a single item which will be the Room Schedule card that you have configured. Since it will only contain this single item, you can give a name that best describes the function of the channel such as Conference Schedule Board. You can also select a custom icon to make it easy to identify the channel for assignment.

1

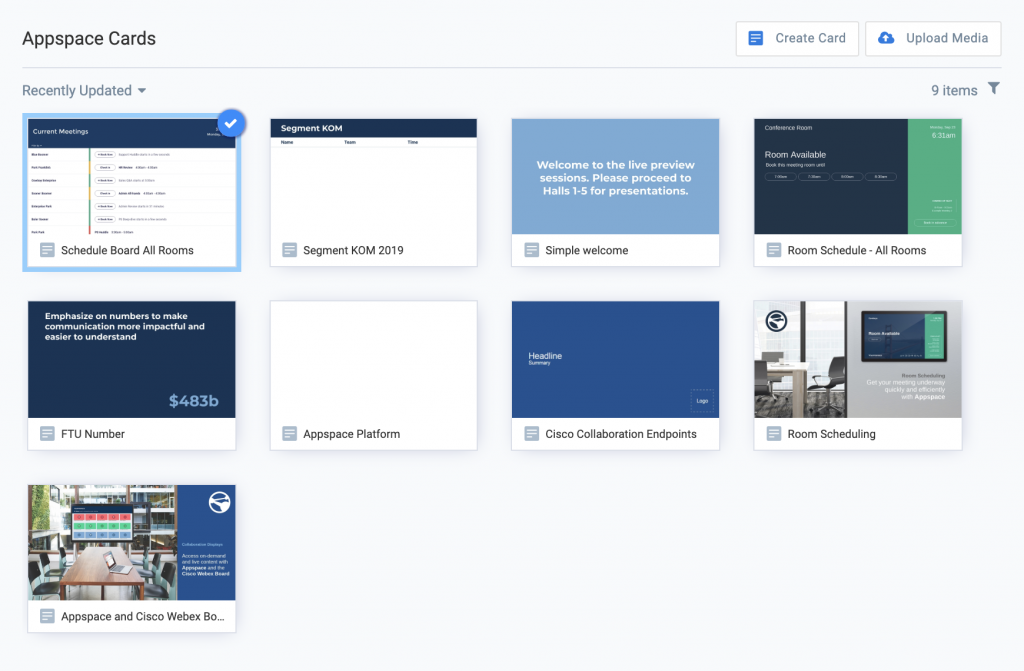
Add the Schedule Board card to the channel

Click on the Add Content button in the newly created channel and select the Schedule Board card you created and configured.

2

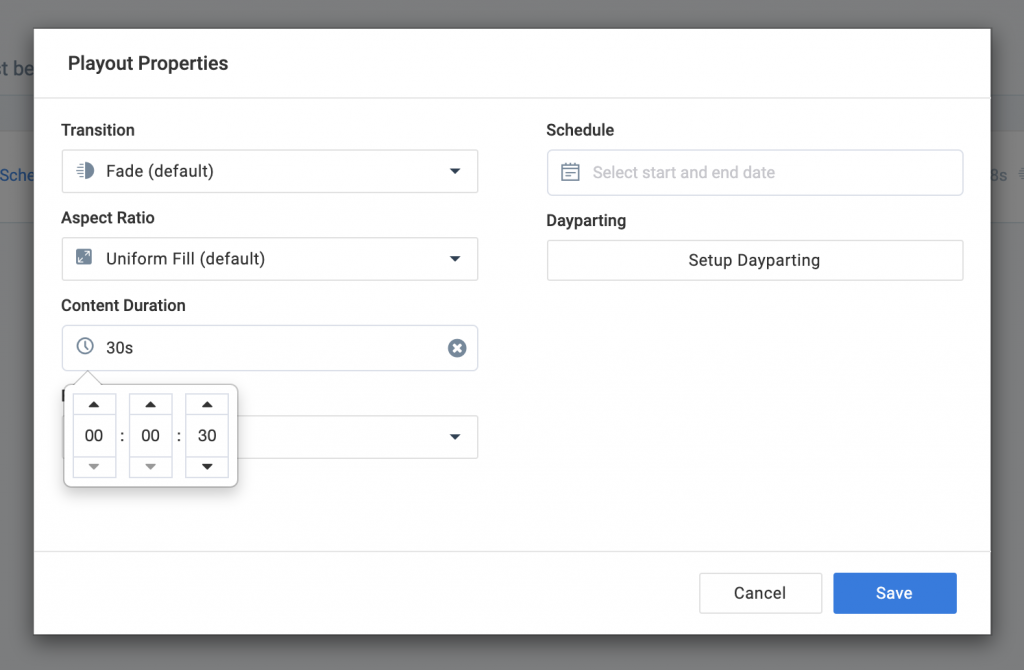
Set the content duration for the Schedule Board card

As your channel will only have a single Schedule Board card, we recommend setting the content duration to a minimum of 30 seconds instead of the default value of 8 seconds. This ensures that the channel does not keep reloading the card while someone is in the process of booking a room. Click on Apply to confirm your settings.

3

Select your target device for assignment

With the channel ready, you will then need to assign the channel to your target device. Go to the Devices workflow and select the device from the list to do the channel assignment.

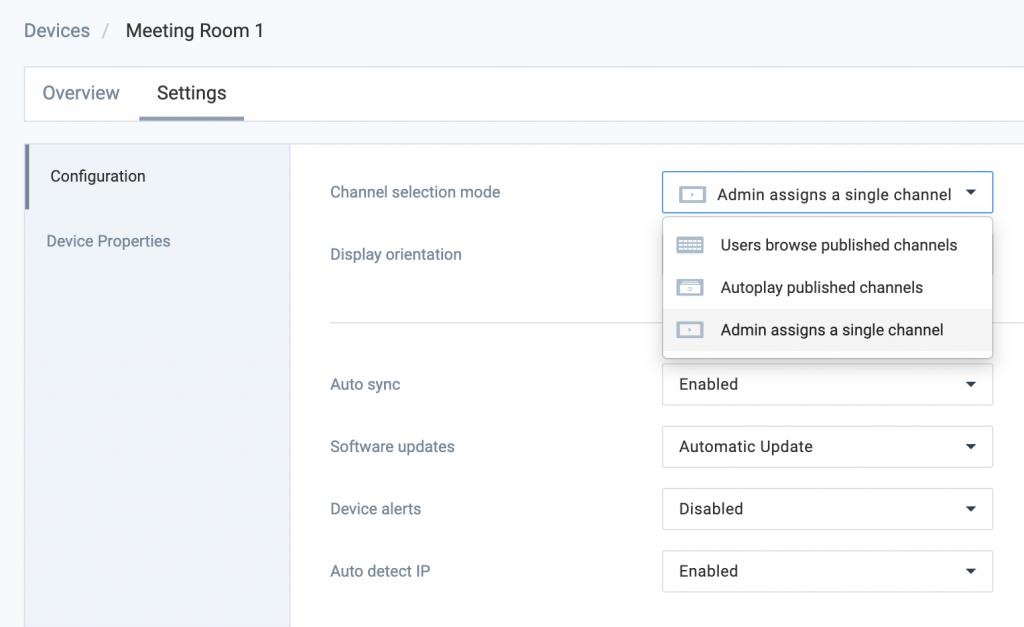
Selecting the device will launch the Device Information overlay. Click on the Settings tab and select Admin assigns a single channel from the Channel selection mode dropdown. Click on Save to apply the settings.

4

Set the channel assignment for the device

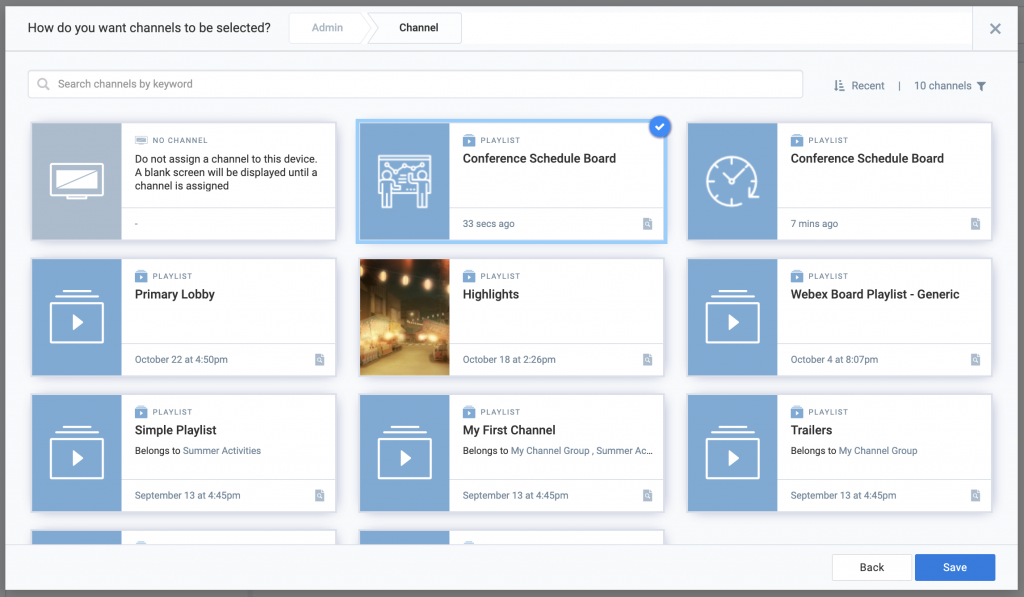
Click on the Overview tab and you will now see the option to select a channel for this device. Click on the Select channel button and select the Schedule Board channel you created and then click on Save to confirm the channel assignment.

Once the settings take effect, the device will automatically show the appropriate details for all the rooms. You are now also ready to book meetings!

5

Congratulations!

You have successfully configured the Schedule Board card with your calendar provider and deployed it to a device.

Now that the device has been configured to connect to the appropriate rooms, everyone can start using it to book meetings from the central schedule board itself, and also view the current meeting information for all connected rooms and spaces.

To learn more advanced topics such as how to configure the card with simple wayfinding, you can refer to the following how-to article: Schedule Board (Multi-rooms) with Maps.

What's Next?

Deepen your knowledge of Appspace administration details for channels and more by taking a look at administration paths and guides.